
What is the best succulent and cactus soil Succulent and Cactus Soil Guide With a great soil mix, you not only provide your plant’s necessary nutrients and anchorage but help to prevent root rot! the best way to give your plants a better chance to thrive is by setting the roots right, with the […]
Desert Landscaping
Planning for desert landscaping If you live in a dry and arid climate then your desert landscaping is going to take a little more planning than some other parts of the country, yes still your plants will thrive if you pick them correctly desert landscaping naturally will have to work with a plan that includes […]
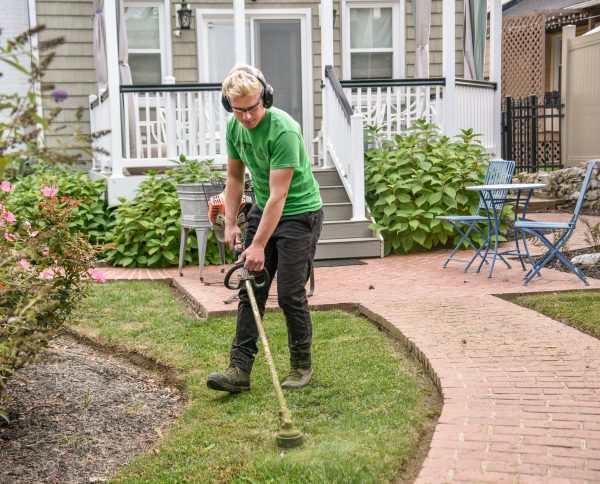
landscaping maintenance services
Ok so you decided to hire a professional landscape service to help you out, but what are the services they offer, and what services do you really need. Landscaping maintenance services can integrate the entire state and health of your garden, from the most basic to the most complete example of a landscaping services list […]

Seed Starting Mix
Seed Starting Mix The Best Option to Nourish the Seedlings comes up as the Seed Starting Mix Seed starting mix plays an important role in explosive plant growth. It’s a good mixture of soil to give the seedings the ideal environment to germinate and grow into a healthy young plant. Unlike the usual potting soil […]
How to grow your own food
How to Grow Your Own Food: Got a big enough garden or by any chance a fruit tree farm? Great, you are fortunate enough to grow your own, healthy food. Growing food yourself is pretty enjoyable. It helps you spend some time in nature and saves a lot of bucks on daily fruit vegetable shopping. […]
Building a Better Worm Bin for Composting
Originally from http://www.veggiegardeningtips.com/building-a-better-worm-bin-for-composting/
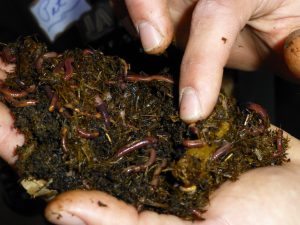
There are plenty of options for raising composting worms in bins, from basic home-made boxes to high-tech structures that can be purchased at retail stores or through the Internet. I tried many types of worm bins before finally settling on a simple and effective version as the best for my purposes, and will share that design with you today.
This home-made worm bin is based on a Vermiculture workshop that I attended at the Rodale Institute several years ago and have I have managed to keep a colony of composting worms alive and well ever since then with no losses. By “no losses” I mean that the worm population did not die off or migrate out of the bin.
Achieving Care Free Success with Composting Worms
 In addition the bedding has remained in good condition, the worms have multiplied, and the moisture levels have remained consistent without the extremes of drying out or becoming over saturated to the point of leaching liquids. My bin has been relatively care free; all I’ve done is feed the worms.
The only possible issue has been the infiltration of foreign soil organisms such as snails and other tiny creatures. Even this has not created a problem and probably could have been avoided if I had not introduced organic matter and some yard waste from the garden into the bin. On the other hand the diversity could actually be a sign of a healthy bin and nothing has grown out of control at this point.
Creating a Simple Worm Bin out of Recycled Materials
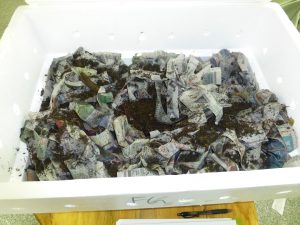 But let me get back to the worm bin itself and share how easy it is for you to make one for yourself. Most of the bins that you find will be made out of plastic or wood, but the material of choice for my bin is Styrofoam. Like the common Styrofoam coolers that you are familiar with, but I recommend recycling the Styrofoam shipping containers that you can find at pet stores. They are larger, sturdy, and used to transport aquarium fish and other critters to the stores.
The thing that makes Styrofoam ideal for shipping aquarium fish also helps create a great environment for worms; it’s the insulating properties! My worms love their Styrofoam bin. How do I know? Well besides them surviving, and multiplying, they never wander off even though my bin has large holes drilled all over it. That is all there is to the bin construction, you simply drill one inch size holes into the sides and bottom the Styrofoam tub.
Adding Bedding and Red Wiggler Worms to the Bin
I’ve come to wonder about the necessity of the holes, and in my next bin I may skip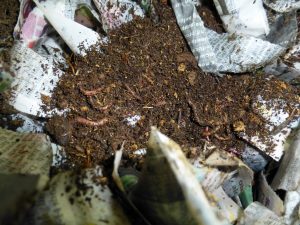 them altogether. Or maybe I’ll just place a single hole at one end of the worm bin just in case there ever is any excess moisture that needs to drain off, even though that hasn’t been the case since I began using this type of bin. I do keep a shallow tray underneath the bin to protect the floor and the bin itself sits on a few one by one wood strips to allow for air circulation.
When I first started this bin I used shredded newspaper that was moistened and a couple handfuls of garden soil. The soil added a bit of biology to an otherwise rather sterile environment and the newspaper made up the bulk of bedding material that the worms live in. Place a few inches of bedding on the bottom of the bin, sprinkle the soil across, and then add the composting worms to the center. Top things off with a few more inches of bedding, put the lid on, and your bin is ready to work.
Feeding the Worms and Basic Maintenance of the Bin
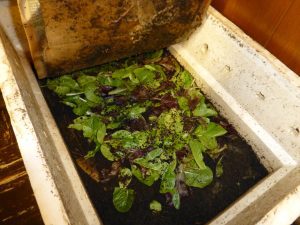 To feed I usually bury a thin layer of kitchen scraps in the bedding to start with. Over time as the bedding is converted into compost and castings I will just place the food on top over a third to half of the bedding surface of the bin. I also cut a piece of heavy cardboard to lay across the top of the bedding/food in the worm bin. The worms love scraps like salad mixes that are beginning to decompose, cantaloupe rinds, and they will even eat paper.
You can use a spray bottle of distilled or spring water to mist the bedding if it shows signs of drying out, but my bin has seemed to maintain enough moisture that I have not needed to mist it on a regular basis. Over time you will see the depth of the bedding rise as the worms convert the food scraps into rich, dark brown, castings. The worm castings are an amazing soil conditioner and plant fertilizer that will find many uses in the garden and I will talk more about that in a future article.

How To Add Nitrogen To Soil
https://plantcaretoday.com/how-to-add-nitrogen-to-soil.html